9 Tips: Using a Trenching Spade for Creative Yard Projects
Cold damp earth releases a sharp metallic scent as the steel blade slices through the rhizosphere. You feel the resistance of compacted clay give way to the leverage of a sharpened edge. Using a spade for yard design requires more than brute force; it demands an understanding of soil physics and root architecture. A trenching spade, characterized by its narrow four inch blade and reinforced spine, is the precision instrument of the serious horticulturist. It allows for surgical interventions in the soil profile without disrupting the delicate mycorrhizal networks that sustain plant health. When the blade enters the substrate, you are not just moving dirt. You are managing the bulk density of the soil and ensuring that oxygen can reach the root zone. Proper execution prevents the loss of turgor pressure in nearby specimens by minimizing collateral root damage. This tool is the bridge between a conceptual landscape plan and a biologically thriving ecosystem. Every incision must be intentional to preserve the structural integrity of the soil horizons.
Materials:
The success of any trenching project depends on the chemical and physical composition of the substrate. Ideal yard design begins with a friable loam. This soil type typically consists of 40 percent sand, 40 percent silt, and 20 percent clay. This balance ensures a high Cation Exchange Capacity (CEC), allowing the soil to retain essential nutrients like potassium and magnesium. For most ornamental and structural plantings, the soil pH should be maintained between 6.0 and 7.0 to ensure maximum nutrient bioavailability.
Specific NPK ratios are required based on the project phase. For establishing new root systems in a trench, a "starter" fertilizer with an NPK ratio of 5-10-5 is standard. The higher phosphorus content stimulates ATP production and cellular division in the root apical meristems. If you are working in high-clay environments with low permeability, integrate expanded shale or coarse organic matter to improve the macropore space. This physical amendment prevents anaerobic conditions that lead to root rot. Observe the soil texture; it should crumble when squeezed at 25 percent moisture capacity rather than forming a hard, impenetrable bolus.
Timing:
Timing is dictated by the USDA Hardiness Zones and the physiological state of the local flora. In Zones 5 through 7, the primary window for major trenching and yard redesign opens in early spring, precisely 15 to 30 days before the average last frost date. This period aligns with the end of endodormancy. As soil temperatures reach a consistent 45 degrees Fahrenheit, root respiration increases, and the plant prepares to transition from the dormant phase to the vegetative stage.
The "Biological Clock" of the landscape is a critical factor. Trenching during the peak of the reproductive stage (flowering) is discouraged because the plant is diverting maximum carbohydrates to seed production rather than root repair. Late autumn, after the first light frost but before the ground freezes, is the secondary window. During this time, deciduous plants enter senescence, and the reduction in evapotranspiration rates minimizes the risk of vascular shock. Always check the soil moisture meter before starting; trenching in saturated soil causes irreversible compaction and destroys the soil structure.
Phases:

Sowing and Trench Preparation
Using the trenching spade, carve a clean vertical line to a depth of 12 inches for drainage or 6 inches for edging. The narrow profile of the spade allows for the precise placement of amendments. When sowing seeds for a living border, ensure the trench floor is level to prevent water pooling.
Pro-Tip: Maintaining a clean vertical cut prevents the "glazing" of the trench walls. Glazing occurs when a dull blade smears clay particles, creating a barrier that inhibits lateral root penetration and water infiltration through the soil matrix.
Transplanting with Precision
When moving established shrubs, use the spade to "root prune" a circle around the drip line six months prior to the move. When the time comes for the final transplant, the trenching spade allows you to lift the root ball with minimal loss of the fine feeder roots located in the top 8 inches of soil.
Pro-Tip: This technique leverages auxin suppression. By severing the long lateral roots, you stimulate the production of shorter, more fibrous roots closer to the trunk, which increases the plant's ability to uptake water immediately after relocation.
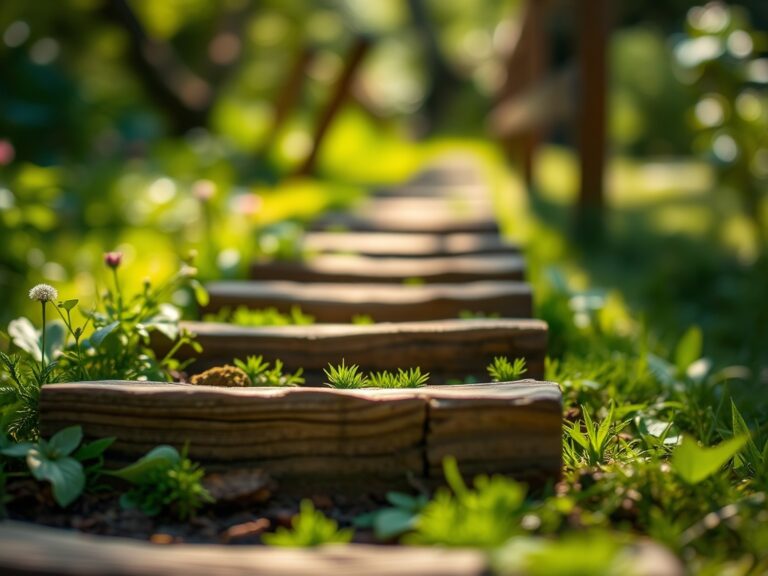
Establishing Structural Edges
For creative yard projects like "English Edging," the spade must be driven at a 90 degree angle. This creates a physical barrier that prevents the encroachment of rhizomatous grasses like Kentucky Bluegrass or Bermuda grass into ornamental beds.
Pro-Tip: This edge creates a "moat" effect that utilizes gravitational water movement. It ensures that irrigation stays within the root zone of the target plants rather than leaching into the turfgrass, optimizing the nutrient delivery to the intended rhizosphere.
The Clinic:
Physiological disorders often manifest when soil management is poor. Use this diagnostic guide to identify and correct issues during your yard design projects.
- Iron Chlorosis: Symptoms include interveinal yellowing on new leaves while veins remain green. This often occurs in high pH soils (above 7.5). Fix-It: Apply chelated iron or elemental sulfur to lower the pH and increase iron solubility.
- Nitrogen Deficiency: Symptoms include general chlorosis (yellowing) of older leaves at the base of the plant. Fix-It: Incorporate a high nitrogen fertilizer (20-0-0) or organic blood meal into the top 2 inches of the trench.
- Phosphorus Lockout: Symptoms include purple or bronze tinting on the underside of leaves and stunted growth. This is common in cold, wet soils. Fix-It: Improve drainage using the trenching spade to break up subsurface "hardpan" layers and apply bone meal.
- Blossom End Rot: Symptoms include a dark, sunken spot on the bottom of fruit. This is caused by calcium transport failure. Fix-It: Maintain consistent soil moisture (1.5 inches per week) to ensure steady calcium uptake through the xylem.
Maintenance:
Post-project maintenance is a game of precision. Use a soil moisture meter to ensure the root zone remains at 40 to 60 percent of field capacity. Most established landscapes require exactly 1.5 inches of water per week delivered at the drip line. Use a hori-hori knife to remove any deep-taproot weeds that emerge in the newly disturbed soil of your trenches. For woody perennials, use bypass pruners to remove any dead or crossing branches, which improves airflow and reduces the risk of fungal pathogens like powdery mildew. Clean your trenching spade with a wire brush and coat the steel in linseed oil after every use to prevent oxidation and maintain a sharp, low-friction edge for the next project.
The Yield:
If your yard design includes cut flowers or edible borders, harvesting is the final stage. Harvest flowers during the "cool" of the morning when turgor pressure is at its peak. Use a sharp blade to make a 45 degree cut, which maximizes the surface area of the xylem for water uptake. For root crops or bulbs planted in trenches, use the spade to gently loosen the soil two inches away from the plant to avoid mechanical damage. Immediately move the harvest to a shaded, high-humidity environment to slow the rate of respiration and preserve "day-one" freshness and nutrient density.
FAQ:
How deep should I dig a trench for yard edging?
Dig to a depth of 6 inches. This depth is sufficient to sever the rhizomes of most common turfgrasses and creates a clean visual break that prevents grass encroachment into your ornamental garden beds.
Can I use a trenching spade in heavy clay?
Yes, but you must sharpen the blade first. The narrow profile of the trenching spade reduces the surface area contact, making it easier to penetrate heavy clay than a standard round-point shovel.
What is the best way to clean a spade?
Remove all soil with a stiff wire brush. Use a sharpening stone to hone the edge to a 45 degree bevel. Wipe the metal with a thin layer of mineral or linseed oil to prevent rust.
When is the best time to redesign my yard?
Early spring or late autumn are ideal. These windows avoid the heat stress of summer and the frozen ground of winter, aligning with the plant's natural dormant or early vegetative growth cycles.